The Basics of Dovetail Joinery
Dovetail joinery, with its distinctive interlocking wedge shapes, has long been revered by woodworkers and artisans for both its aesthetic charm and structural robustness. It stands as a testament to the intricate blend of form and function, a symbol of craftsmanship that dates back centuries. Originally used in ancient Egypt and China, the dovetail joint has transcended time and remains one of the most reliable and coveted methods of joining two pieces of wood at right angles. In this guide, we will delve into the foundational elements of dovetail joinery, from the tools and techniques to its myriad applications. Whether you’re a seasoned craftsman or a budding enthusiast, understanding the basics of this age-old technique will enhance the quality and beauty of your woodwork.
What is Dovetail Joint?
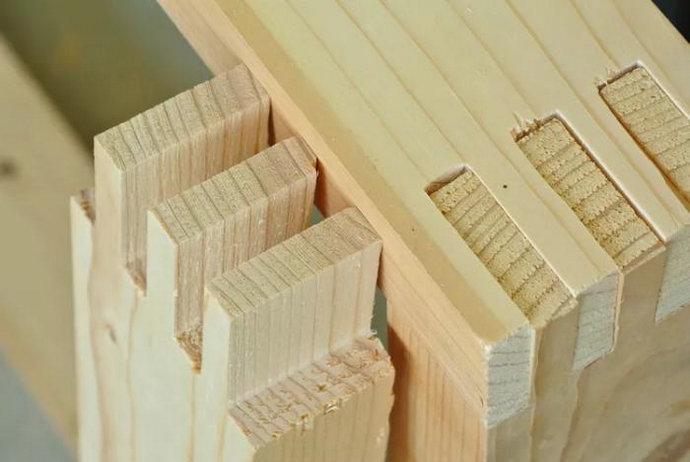
Dovetail joints are a popular woodworking technique designed to create a strong and interlocking connection between two pieces of wood. This joinery method consists of pins and tails that resemble the shape of a dove’s tail, hence the name. English dovetail joinery is a common type of dovetail joint, known for creating a tight fit and robust drawers or furniture pieces.
In a dovetail joint, the pins and tails interlock to form a secure bond without the need for nails or screws. The overlapping flared connectors provide increased durability and resistance to wear. Additionally, due to the strong nature of the dovetail joint, it has been widely used in furniture construction for centuries.
The History of Dovetail Joint
The dovetail joint has a long and storied history, dating back thousands of years. It was already in use in ancient Egyptian and Chinese civilizations, with evidence of dovetail joinery found in tombs and furniture from these periods. The technique’s popularity grew thanks to its efficiency and effectiveness, eventually becoming a mainstay in carpentry and woodworking around the globe.
English dovetail joinery, in particular, gained prominence during the Industrial Revolution in England. The stability and strength of English dovetail joints made them an ideal choice for furniture construction, especially as demand for high-quality and long-lasting pieces increased.
Throughout the years, different types of dovetail joints have been developed to cater to specific needs or preferences while maintaining the core principles of this timeless technique. Among these variations are through dovetails, half-blind dovetails, and the English dovetail, which remains a popular choice for woodworkers today.
English Dovetail: What You Should Know
What is the English Dovetail
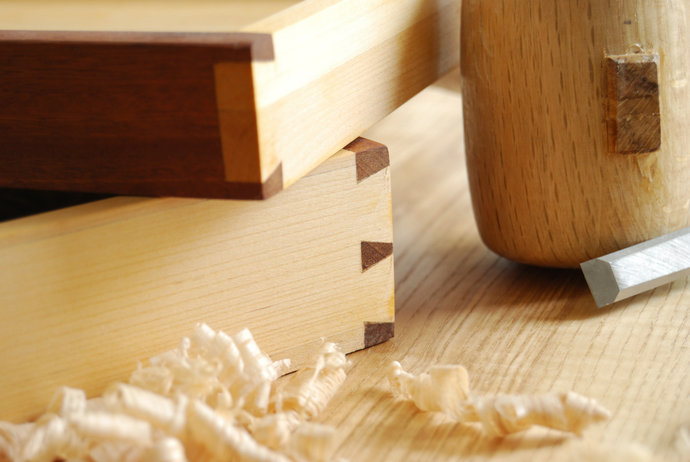
The English dovetail involves cutting a series of interlocking pins and tails into the ends of two pieces of wood. When the pieces are fitted together, the joint is held firmly in place due to its wedge-shaped structure, increasing the wood’s resistance to pull-apart forces.
French Dovetails vs. English Dovetails
Here are some noteworthy points of the differences between English and French dovetails:
- Appearance: English dovetail joints have visible pins and tails on the outside, whereas French dovetails are concealed, only showing the joint on the underside of the drawer. This means that English dovetails display the craftsmanship of the woodworker, while French dovetails provide a cleaner, more streamlined look.
- Construction: English dovetails have a more straightforward construction process, with pins and tails fitting together at right angles. In contrast, French dovetails involve cutting the pins and tails at a slight angle to create a narrower joint at the front of the drawer, concealed from view.
- Strength: Both French and English dovetails provide strong connections, thanks to their interlocking design. However, some argue that the English dovetail may offer slightly more strength due to the larger surface area of contact between the pins and tails.
Types of Dovetail Joints
In this section, we’ll explore different types of dovetail joints used in English dovetail joinery.
Through Dovetail Joint
A through dovetail joint is the traditional technique that most people associate with dovetail joinery. In this method, both boards being joined have pins and tails cut into their edges. When assembled, you can see the dovetail joint from all sides, resulting in a strong and visually appealing connection.
Sliding Dovetail Joint
Also known as “French dovetails,” sliding dovetail joints consist of a single deep dovetail and an accompanying dado (a groove cut into the surface of a piece of wood). To create this joint, one piece slides into the dado of another, forming a strong bond. This joint is especially useful for joining two boards at right angles without exposing end grain.
Half-Blind Dovetail Joint
Half-blind dovetail joints, also known as blind dovetails, are a variation of the traditional dovetail joint where only one side of the joint is visible. In this case, the tails are cut into the edge of one board, while the pins are cut into the end of the other. When assembled, the joint is visible only on one side, providing a clean look for projects like drawer fronts.
Secret Double-lapped Dovetail
The secret double-lapped dovetail joint is a variation in which the pins and tails are completely concealed when the joint is assembled. This type of joint is more labor-intensive but provides a seamless appearance, making it perfect for high-end furniture and cabinetry where aesthetics are crucial.
Secret Mitered Dovetail
Lastly, we have the secret mitered dovetail joint, a variation that joins two boards at a right angle and cuts the material at 45 degrees. This technique hides the pins and tails completely, creating a clean and sharp mitered corner. The hidden dovetail joint provides strength and stability, making it an excellent choice for frames and corners where both aesthetics and strength are essential.
Furniture and Dovetail Joint
Cabinets
When it comes to furniture construction, especially cabinets, English dovetail joinery is a reliable and strong option. This joinery technique involves interlocking “tails” and “pins” that create a sturdy and long-lasting connection. You’ll often find this technique used in high-quality cabinets and built-in cupboards, ensuring the corners remain secure and durable.
In your quest for well-crafted furniture, keep an eye out for English dovetail joints in the construction of cabinets. Their durability and strength, paired with their attractive appearance, make them a popular choice for quality furniture.
Drawer Construction
For drawer construction, the use of English dovetail joints is a valuable addition, providing both strength and aesthetics. English dovetail joints differ from their French counterparts in the way the drawer front, sides, bottom, and back are connected. In English dovetail construction, tails extend slightly from the side of the drawer, giving your drawer an attractive and detailed appearance while ensuring a strong connection between the front and sides.
When examining the quality of a dovetail drawer, look for this overlapping, flared connector pattern to identify the English dovetail joinery. Not only does this create a robust connection, but it also contributes to the overall appearance and craftsmanship. So, when investing in furniture, ensure you look for pieces that use English dovetail joinery – it’s a sign of durability and excellent design.
Best Practices for Dovetail Joinery
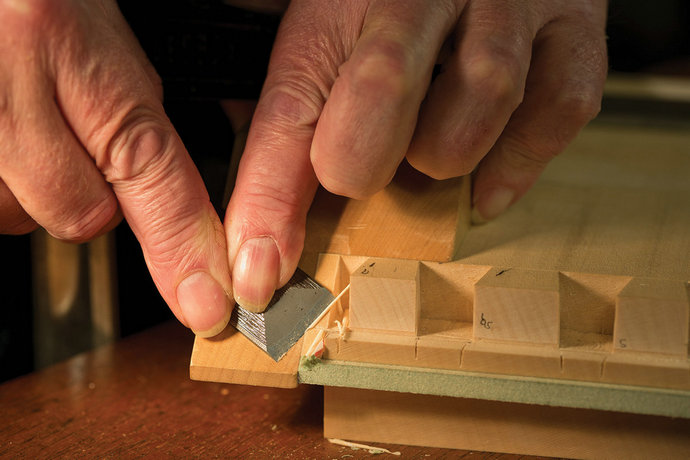
Dovetail joinery is a popular woodworking technique that creates a strong bond between two pieces of wood. When done correctly, it not only adds structure to your project but also showcases your craftsmanship. To achieve the best results, follow these friendly tips while working with English dovetail joints.
1. Choose the right wood: While you can use dovetail joinery with both hardwoods and softwoods, some wood species are more suited to the technique than others. Popular choices include oak, cherry, and walnut for their stability, strength, and ease of working with.
2. Use sharp tools: Sharp chisels and saws are essential for clean, precise cuts. Regularly hone your tools to maintain their sharpness and ensure smooth dovetail joints.
3. Practice makes perfect: Don’t expect to create flawless dovetails on your first try—practice on scrap pieces of wood before tackling your main project. You’ll quickly improve your saw control, layout, and chisel work.
4. Use the right glue: The adhesive you choose can significantly impact the strength and durability of your joint. Opt for a water-resistant, high-quality wood glue that will stand the test of time.
5. Mark both boards simultaneously for accurate alignment: Place the two pieces you want to join together and mark the tails and pins at the same time. This will ensure that they fit together seamlessly.
6. Assemble with care: When joining the two pieces, take your time and carefully align the pins and tails. Apply gentle pressure to avoid damaging the wood or your joint.
7. Avoid over-sanding drawer fronts: If you’re using dovetail joinery for drawer fronts, be cautious not to over-sand the joints. Doing so can weaken the connection and impair the appearance of your craftsmanship.
By following these best practices, you’ll be well on your way to mastering English dovetail joinery and creating beautifully crafted wooden projects that will stand the test of time.
Tools and Techniques for Dovetail Joinery
Dovetail joints are a classic woodworking technique used to join two pieces of wood at a right angle, often seen in drawers and boxes. As a woodworker, you can create strong and visually appealing dovetail joints by using the right tools and techniques.
To start with, you’ll need a good set of chisels and a mallet for hand-cutting your dovetails. A joiner’s mallet or a small 14-ounce brass mallet helps deliver a strong punch. Your chisel set should include various sizes, such as ¼”, ⅜”, ½”, and ¾”.
A dovetail saw is another essential hand tool for this type of joinery. You’ll use it to make precise, angled cuts on the wood. In addition to hand tools, you might also consider using a router for cutting dovetails. With a router and a dovetail jig, you can achieve clean and consistent joints quickly and efficiently. Routers come in multiple sizes, so choose one based on your specific needs and the scale of your projects.
A dovetail jig is an invaluable asset when working with a router. This adjustable template ensures that your cuts remain accurate and uniform, resulting in perfectly fitting dovetail joints. There are various types of jigs on the market, so make sure to pick one that suits the type of dovetail joints you plan to create and is compatible with your router.
When cutting dovetails by hand, here’s a brief overview of the steps you’ll follow:
- Begin by marking and measuring the tails on one piece of wood.
- Cut the tails using your dovetail saw, starting at the top and working your way down to the base.
- Remove the wood between the tails using a chisel. Chisel away from the front, then flip the board and continue from the other side.
- Place the cut-out piece on the edge of the second piece of wood and use a pencil or knife to mark the pins, then cut them using the dovetail saw.
- Chisel away the waste wood between the pins, and finally, clean up the joint surfaces.
Remember, practice makes perfect! Crafting a flawless dovetail joint takes time and patience. By incorporating the right tools, techniques, and attention to detail, you’ll surely elevate your woodworking joinery skills and produce strong, beautiful dovetail joints.
Frequently Asked Questions
What is the purpose of dovetail joints?
Dovetail joints are used to securely connect two pieces of wood at a 90-degree angle. They’re made up of interlocking wedge-shaped components called tails and pins, which create a strong bond when fitted together. Dovetail joinery is commonly used in furniture construction, especially for creating drawers.
How do you create a dovetail joint?
To create a dovetail joint, follow these steps:
- Mark out the desired dovetail pattern on the edges of both pieces of wood you want to join.
- Use a saw to carefully cut along the marked lines, creating the tails on one piece and the pins on the other.
- Chisel out the waste material between the tails and pins, making sure the spaces are clean and properly shaped.
- Dry-fit the joint by sliding the tails into the pin sockets. Adjust as needed for a snug fit.
- Apply wood glue to the joint and assemble the pieces, clamping them together until the glue dries.
What are the advantages of dovetail joinery?
The advantages of dovetail joinery include:
- Strength: The interlocking nature of dovetail joints makes them very strong and resistant to pulling apart. The design can even hold without the use of glue, although glue will enhance the joint’s longevity.
- Durability: Due to their strength, dovetail joints can withstand wear and tear and hold up well over time.
- Aesthetics: Dovetail joints have a visually appealing and classic appearance, often seen as a mark of quality craftsmanship in woodworking.
How do you use a dovetail jig?
A dovetail jig is a tool used to simplify and speed up the process of creating dovetail joints. Here’s a basic outline of how to use one:
- Secure the jig to your workbench and adjust it to accommodate the width and thickness of the wood pieces you’re working with.
- Clamp one of the wood pieces in the jig, aligning it with the template for creating pins or tails.
- Set your dovetail router bit to the appropriate depth and attach it to your router.
- Follow the guidelines of the jig to make precise cuts along the template, creating the pins or tails as needed.
- Remove the wood piece from the jig, and repeat the process for the other piece.
- Once you have cut the pins and tails on both pieces, assemble and glue them to complete the dovetail joint.


