Furnishing an apartment is a significant undertaking. Every homeowner wants to create a space that is both beautiful and functional, yet without a clear strategy, the process of how to furnish your new apartment can quickly become overwhelming.
The key to successful apartment furnishing lies in balancing function, aesthetics, and budget. This comprehensive 10-step guide breaks down everything you need to know, ensuring you create a comfortable, stylish, and functional apartment or home without unnecessary expense.
Step 1: Measure Everything
Before you fall in love with a gorgeous sectional or the perfect bookshelf, you must become intimately familiar with your space’s dimensions. The most common furnishing mistake is purchasing items that simply don’t fit – either overwhelming the room or appearing disproportionately small.
Begin by measuring the length and width of each room, noting architectural features like alcoves, built-in features, and irregular angles. Don’t forget to measure ceiling height, as this will determine what types of lighting fixtures and tall furniture will work. Next, document all doorways, hallways, and stairwells that furniture must pass through to reach its destination. That beautiful armoire becomes useless if it can’t navigate the sharp turn into your bedroom. A good rule of thumb is to always have your tape measure on hand when shopping and to double-check the dimensions of both the furniture and your access routes.
Step 2: Define Your Budget
Furnishing an entire apartment represents a significant financial undertaking, making budgetary planning essential. Begin by determining your total furnishing budget, then break it down by category or room based on your priorities.
A great way to save money is to adopt a phased approach. Allocate the majority of your initial budget to basic furniture and essential items you need most: a quality mattress, a comfortable sofa, and practical storage solutions. Plan to acquire decorative items like art and accent pillows over several months or even years. This strategy not only spreads out financial outlays but also allows your style to evolve naturally.
Research price points for different furniture categories to set realistic expectations. Remember to factor in additional costs beyond furniture itself: delivery fees, assembly costs, tools you might need, and potential customization expenses. If working with a tight budget, buying used furniture for items like dining chairs and nightstands is another excellent way to stretch your budget, rather than buying everything brand-new.
The most successful apartment interiors often mix investment pieces with affordable finds, creating a collected, personalized look that doesn’t break the bank.
Step 3: Find Your Style
Before purchasing any piece of furniture, develop a clear vision for your aesthetic direction. Your apartment should feel like home to you, reflecting your unique personality while creating a cohesive, harmonious environment. Without a defined style direction, you risk creating a fragmented space that feels more like a furniture showroom than a home.
To discover your design style, ask yourself: Do you consistently gravitate toward clean lines and minimal spaces? Or are you drawn to cozy, textured interiors with layered patterns? Common style categories include Mid-Century, Modern, Scandinavian, Industrial, Bohemian, Coastal, and Farmhouse, though most people develop a hybrid style that incorporates elements from multiple traditions.
Identify a color palette that resonates with your chosen style. Typically, a successful scheme includes: 60% dominant color (usually walls and large furniture), 30% secondary color (upholstery, curtains), and 10% accent color (decor, pillows).
This style guide will serve as your north star throughout the furnishing process, ensuring each new addition contributes to a unified whole.
Step 4: Focus on the Bedroom First
The bedroom deserves priority in your furnishing journey because quality sleep fundamentally impacts every aspect of your life. This private sanctuary should be designed for restoration and relaxation above all else.
Start with the Sleep Foundation: The Mattress
Priority: This is your most important health investment for the space.
Testing: Try mattresses in person whenever possible.
Considerations:
- Your preferred sleeping position (side, back, stomach)
- Your weight and body type
- Specific needs like back support or temperature regulation
Select a Supportive and Stylish Bed Frame
Function: Complements the mattress and defines the room’s aesthetic.
Space-Saving Options:
- Platform beds with built-in drawers
- Beds with hydraulic lifts for under-bed storage
- Frames with a minimalist footprint to make the room feel larger
Address Clothing and Bedtime Storage Needs
Essential Pieces:
- Dresser or Chest of Drawers: For essential clothing storage.
- Nightstand: Provides surface and storage for bedtime necessities (light, water, book, glasses).
Additional Solutions for Limited Closets:
- Freestanding wardrobe or armoire
- Storage bench at the foot of the bed
- Decorative baskets and under-bed storage containers
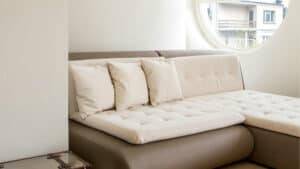
Step 5: Furnish the Living Room
As the social heart of your home, the living room must balance comfort, functionality, and style. This multi-functional space often serves for entertaining, relaxing, working, and dining, requiring thoughtful furniture selection and arrangement.
Start with the Centerpiece: The Sofa
Significance: The sofa is typically the largest investment and the focal point of the room.
Selection Criteria:
- Lifestyle: Choose durable, stain-resistant fabrics for households with pets or children.
- Entertaining: Prioritize ample seating (e.g., a large sectional) if you host frequently.
- Scale: Measure carefully to ensure the sofa’s dimensions work with your room’s size.
- Comfort: Always test for comfort in person if possible.
- Color: Neutral upholstery offers long-term flexibility, while a bold color makes a style statement.
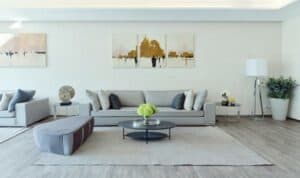
Arrange for Conversation and Flow
Layout: Position seating to face each other in a circular or U-shaped configuration to encourage conversation.
Traffic: Ensure clear, logical pathways for moving through the room without disrupting the conversation area.
Incorporate Additional Seating
Add an accent chair, ottoman, or bench to provide extra seats for guests. Use these secondary pieces to introduce contrasting patterns, textures, or accent colors.
Anchor the Space with a Rug
A properly sized area rug defines the conversation area and adds warmth. Avoid a common mistake by choosing a rug large enough so that all front furniture legs can rest on it. This creates a unified and well-proportioned look.
Step 6: Set Up the Dining Area
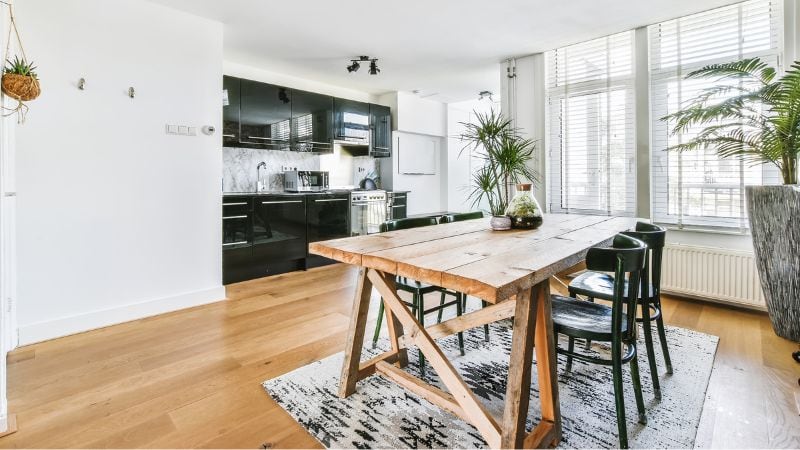
Whether you have a dedicated dining room or a multifunctional eat-in kitchen, creating an inviting space for meals enhances daily life and facilitates social connection. Your dining setup should accommodate both everyday use and occasional entertaining.
Select the Right Table
Measurement Rule: Ensure at least 36 inches (~91 cm) between the table edge and walls or other furniture for comfortable chair movement and traffic flow.
Shape Considerations:
- Round Tables: Ideal for facilitating conversation in smaller, square-shaped rooms.
- Rectangular Tables: Best for efficiently filling longer, narrower spaces.
Material Choices:
- Solid Wood: Withstands heavy daily use and is durable.
- Glass: Creates a sense of visual lightness and openness in compact spaces.
Choose an extendable table if you regularly host guests but have limited daily space.
Choose Chairs for Comfort and Cohesion
Prioritize chairs that are comfortable for long meals and made of durable materials.
Style Types:
- Side Chairs: Standard choice that tucks neatly under the table to save space.
- Armchairs: Use at the heads of the table for a more dramatic and comfortable statement; they require more space.
For an eclectic look, you can mix chair styles. To maintain cohesion, ensure they share a common element like color, material, or design era.
Incorporate Functional Storage (If Space Allows)
Key Piece: Add a buffet, sideboard, or console table.
Benefits:
- Provides hidden storage for linens, servingware, and dinnerware.
- Offers valuable surface area for serving food during gatherings or displaying decorative items.
Step 7: Add Storage & Surfaces
Effective storage solutions can transform a small apartment from cluttered to curated, while surfaces provide practical space for daily activities and decorative displays.
Storage Solutions
Entryway:
- Problem: Collects keys, mail, bags, and outerwear.
- Solution: A console table with drawers or cabinets, plus a catch-all bowl or tray for small items. A bench with storage offers seating and space for shoes.
Living Area:
- Problem: Gathers remote controls, magazines, books, and throw blankets.
- Solution: Use stylish baskets, storage ottomans, and side tables with shelves or drawers to corral clutter neatly.
Bedroom:
- Problem: Accumulates clothing, accessories, and personal items.
- Solution: Utilize under-bed storage containers, a additional dresser, a storage bench, or baskets to keep surfaces clear.
Vertical storage—floating shelves, bookcases, and wall-mounted units—maximizes space without consuming precious floor area.
Surface Placement
Surface placement proves equally important to functionality.
- In living areas, ensure every seat has easy access to a surface for drinks, books, or devices—typically achieved through coffee tables and side tables.
- Bedside tables should accommodate lamps, water glasses, and nighttime necessities.
- In dining areas, consider serving carts or sideboards that provide additional surface space during entertaining.
When selecting these pieces, consider both proportion (relative to nearby furniture) and practicality—smooth, easy-to-clean surfaces for eating areas, and durable materials for high-use locations.
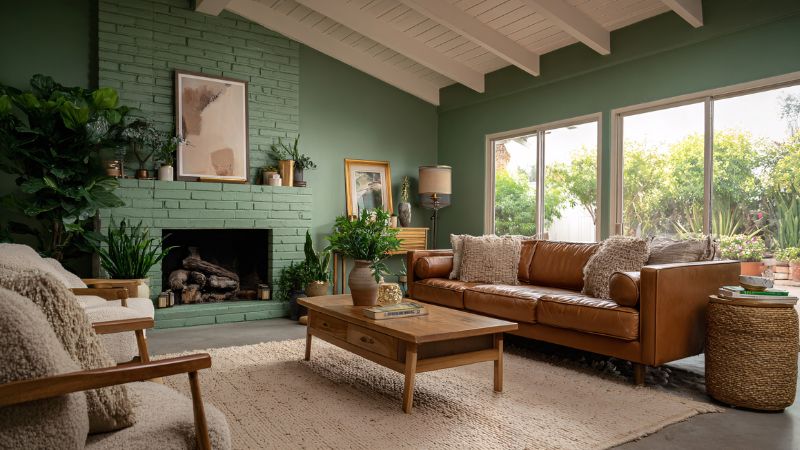
Step 8: Layer in Softness
Textiles transform sterile spaces into welcoming homes by adding comfort, sound absorption, and visual interest through color and pattern.
Start with window treatments, hanging curtains high and wide to enhance perceptions of space and light; use full panels (1.5–2 times the window width) layered with sheers and blackouts for versatility.
In bedding, combine fitted and flat sheets with blankets or duvets and decorative pillows for both style and practical seasonal adjustment.
Area rugs define spaces and add warmth—ensure they are large enough that in living areas, all front furniture legs rest on them, and under dining tables, they extend at least 24 inches on all sides.
Finally, incorporate throw pillows and blankets in varied textures and patterns to personalize your space affordably and allow easy seasonal updates.
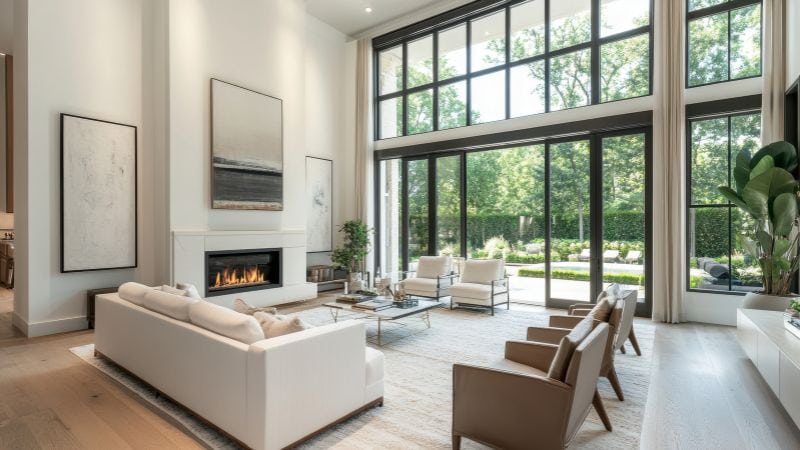
Step 9: Light It Right
Lighting is a powerful but often underestimated tool in interior design, crucial for setting mood, enhancing features, and elevating functionality. An effective lighting plan uses a layered approach with three key types:
- Ambient lighting provides general illumination through ceiling fixtures, track lights, or floor lamps.
- Task lighting serves practical needs, such as reading lamps or under-cabinet kitchen lights.
- Accent lighting adds drama by highlighting art, shelves, or architectural details.
Select bulbs with warmer color temperatures (2700K–3000K) for living and sleeping areas to create a cozy atmosphere, and cooler temperatures (3500K–4100K) for task-focused spaces like kitchens and home offices. The right lighting transforms ordinary rooms into inviting, functional, and aesthetically pleasing environments.
Step 10: Hang Art & Mirrors
Art and mirrors provide the essential finishing touches that transform a furnished space into a personalized home. They express your style and create focal points.
When displaying art, consider its scale and positioning in relation to your furniture—aim for pieces that span about two-thirds the width of furniture pieces. Hang artwork with the center at eye level, approximately 57–60 inches from the floor, adjusting slightly for very high ceilings. Group smaller works into gallery walls with even spacing for cohesion.
Mirrors combine function and beauty by reflecting light to brighten rooms and create an illusion of spaciousness. Ideal placements include across from windows, in entryways, or in small areas to amplify light and openness. Treat mirror frames as part of your decor, choosing styles that complement your overall theme.
Conclusion
Furnishing your apartment represents a journey rather than a destination—a process of creating a home that evolves with your changing needs, tastes, and experiences. By following this structured 10-step approach, you’ll create not just a furnished apartment, but a home that welcomes you every time you step through the door.