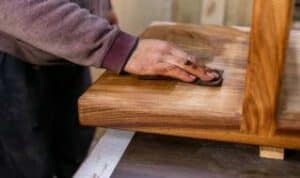
There’s that heart-sinking moment: you’re cleaning, and you see it—a fresh, pale scar marring the surface of your favorite dresser. But here’s a secret every furniture restorer knows: most scratches are easier to fix than you think.
In fact, with a few household items or a quick trip to the hardware store, you can make most scratches vanish from sight. This guide is your friendly first-aid kit for wood furniture. We’ll walk through exactly how to diagnose the wound, choose the right remedy, and apply it with confidence.
The Two Critical First Steps Before You Fix Scratches
Jumping straight in with a random product is the most common mistake. These two steps are your roadmap to a successful repair.
1. Identify the Wood Finish
Is the wood protected by a hard, plastic-like coat, or is the surface more natural and soft? This determines what products will work.
Look and Feel: Run your fingertips across an undamaged area.
- If it feels cool, hard, and very smooth, it’s likely a film-forming finish like polyurethane, varnish, or lacquer. These are common on modern furniture.
- If you can feel the wood grain, it has a warmer feel, and drinks up oils, it might be an oil or wax finish (common on antiques and mid-century pieces).
The Water Test: In a discreet spot, place one drop of water. If it beads up, it’s a film finish. If it soaks in and darkens the wood quickly, it’s likely oil or wax.
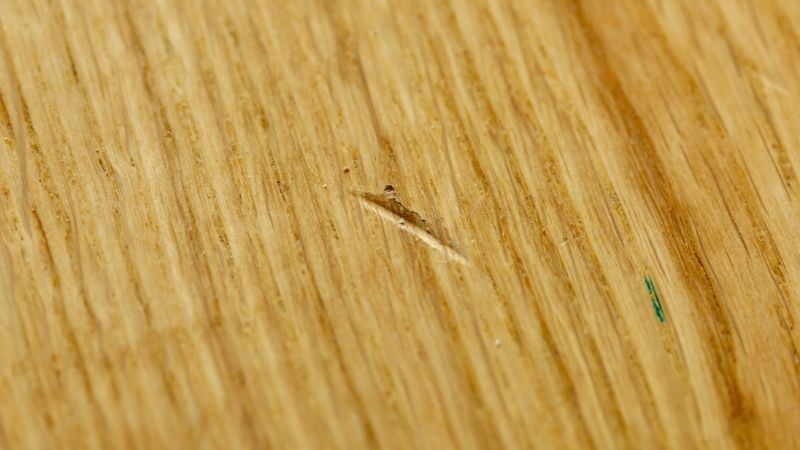
2. Assess the Scratch Depth
Use your fingernail. Gently drag it across the scratch.
- Surface Scratch: Your nail doesn’t catch. The scratch is only in the top clear coat, not the stained wood beneath. (The easiest fix!)
- Light Scratch: Your nail catches slightly. The scratch has broken through the finish and into the stained wood layer, but it’s shallow.
- Deep Scratch/Gouge: Your nail drops in and catches firmly. You can see raw, light-colored wood at the bottom of the groove.
How to Fix Surface and Light Scratches on Wood Furniture
For surface and light scratches, your goal is to camouflage, not rebuild. These methods add color or filler to the groove so it blends with its surroundings.
The Magic of Natural Oils (For Oil/ Wax Finishes)
For shallow scuffs on oiled wood, sometimes all you need is nourishment.
- The Walnut Trick: Simply rub the meat of a raw walnut or pecan firmly over the scratch. The natural oils will darken the exposed wood, often making it disappear instantly. Buff with a soft cloth.

- The DIY Polish Mix: Combine equal parts white vinegar and olive oil in a small bowl. Dab a cloth in the mixture and rub it into the scratch. The vinegar cleans while the oil fills and darkens. Wipe away any excess.
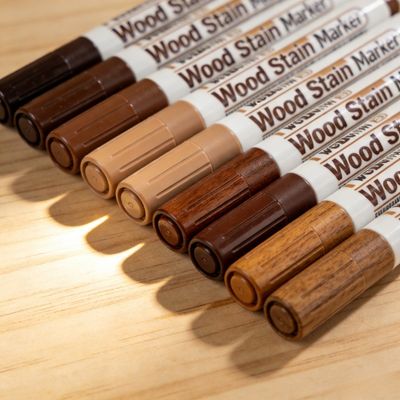
The Color-Match Miracles (For All Finishes)
When the stain color is scratched away, you need to put it back.
Specialized Tools: Wood stain markers and wax filler sticks are your best friends. They come in shades like “Dark Walnut,” “Golden Oak,” etc.
- Clean the scratch.
- Always test color on an unseen area (like the bottom of a leg).
- For a marker: color directly in the groove, wiping excess immediately.
- For a wax stick: rub firmly over the scratch to fill it, then buff off the excess with a clean cloth. It’s like crayoning and erasing.
The Tea Bag Trick (For Raw Wood Scratches)
If the scratch reveals pale, unfinished wood, you can sometimes stain it with items from your pantry. A damp black tea bag (for tan tones) or instant coffee paste (for darker browns) dabbed into the scratch can work wonders. Let dry and seal with a dab of clear wax.
How to Repair Deep Scratches on Wood Furniture
Deeper scratches need physical filler, not just color.
The Wood Filler Approach
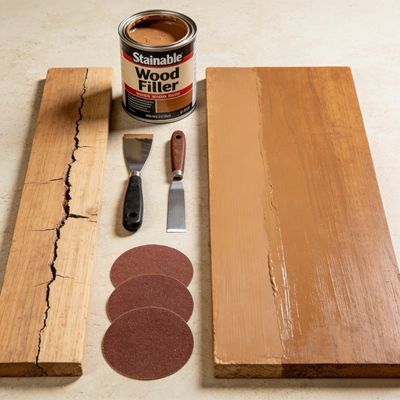
Best for larger, deeper gouges where you will re-stain the area.
- Choose a stainable wood filler close to your wood’s color.
- Force the filler into the clean, dry scratch with a putty knife, overfilling slightly.
- Let it dry completely—this is crucial.
- Sand it flush with the surrounding surface using fine-grit sandpaper (220+), sanding with the wood grain.
- You will likely need to carefully re-stain the filled area to match, then apply a new protective topcoat (polyurethane, etc.) just over the repair.
The Melted Shellac Stick (For Film Finishes)
This is a more advanced, but incredibly effective, professional trick for deep scratches on varnished or lacquered furniture.
- Purchase a shellac burn-in stick that matches your finish color.
- Using a specialized burn-in knife (or carefully with a metal tool heated by a lighter), melt the shellac and drip it into the gouge, overfilling it.
- Let it cool for just a moment, then use the flat edge of the knife to scrape the hardened shellac perfectly flush with the surface.
- The repair is solid and, when done well, virtually invisible.
Common Mistakes to Avoid
Using the Wrong Cleaner: Avoid harsh chemicals, silicone sprays, or all-purpose cleaners. They can damage finishes and prevent repairs from adhering. Use a damp cloth or a cleaner made for wood.
Over-Sanding: Never grab coarse sandpaper and attack the whole surface. You’ll destroy the finish. Sand only the scratch itself or the dried filler, always gently and with the grain.
Skipping the Test Patch: Always, always test your stain, marker, or polish in an invisible area first. Color matching is tricky, and a wrong guess is hard to undo.
Applying Too Much Product: More is not better. Excess oil turns gummy, excess wax turns cloudy, and excess stain creates a dark, obvious blob. Build color slowly.
Ignoring the Finish Type: Using an oil-based trick on a polyurethane finish (or vice versa) will often fail. That’s why Step 1 is so important.
Prevention Tips
A little care prevents a lot of repairs:
- Felt is Your Friend: Apply self-adhesive felt pads to the bottom of everything: lamps, vases, coasters, bookends, and picture frames.
- Lift, Don’t Slide: Never drag objects across a wood surface. Always lift and place.
- Embrace Coasters & Mats: Use them religiously for drinks, plants, and hot dishes. Choose ones with soft, non-scratch bottoms.
- Dust Regularly: Grit and dust act like sandpaper under moving objects. Use a soft, dry microfiber cloth.
- Maintain the Finish: Once or twice a year, use a quality furniture polish or paste wax appropriate for your finish. This adds a protective layer and fills micro-scratches.
Frequently Asked Questions
Can I use olive oil alone to fix a scratch?
While olive oil can temporarily darken and mask a very shallow scratch on an oil-finished piece, it’s not a durable fix. Oil can turn rancid or gummy over time. For better results, use a dedicated furniture wax or a blend like the vinegar and oil polish mentioned in the guide.
I don’t know what finish is on my furniture. What’s the safest method to try first?
The color-match method using a wood stain marker or wax filler stick is generally the safest universal starting point, as it works on most finishes. Just remember the golden rule: always test first.
Will vinegar damage my furniture’s finish?
When diluted (as in the DIY polish mix with oil) and used sparingly for a specific repair, it’s safe for most finishes. However, you should never use straight vinegar as a regular cleaner on wood, as its acidity can degrade finishes over time.
Can I use a crayon or shoe polish to color in a scratch?
It’s not recommended. While they might work in a pinch for a hidden spot, crayons contain non-drying waxes and pigments not meant for wood, and shoe polish can contain dyes that bleed or solvents that damage the finish.
Conclusion
Start with the simplest solution to fix a scratch on wood furniture—try the walnut or a wax stick. You’ll be amazed at what you can achieve with a little knowledge and patience. So if you have scratched furniture at home, why not give it a try right now? Revive its beauty in no time!